Showing posts with label Blogger Hacks. Show all posts

Saturday, 17 July 2010

How to Add Retweet Button to your Blogger Posts

Since Twitter is getting huge popularity these days, adding a cool Retweet Button to your Blogger blog posts can easily get you some decent amount of traffic and promote your content/products to large people in quick time. If you have tons of followers, then you can easily milk it.. ;)

So, here is how to add a nice Retweet button to your blogspot blog posts:

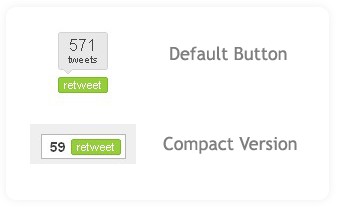
There are two versions of retweet buttons.. one is the default one (looks like digg button) and the other one is Compact version which can fit in small space..

twitter retweet button for blogger


The Code for the Default version is :


<script type="text/javascript">

tweetmeme_url = '<data:post.url/>';

</script>

<script type="text/javascript" src="http://tweetmeme.com/i/scripts/button.js"> </script>


and for Compact version is :


<script type="text/javascript">

tweetmeme_style = "compact";

</script>

<script type="text/javascript" src="http://tweetmeme.com/i/scripts/button.js"></script>


Here is how to add them to your blogger post..

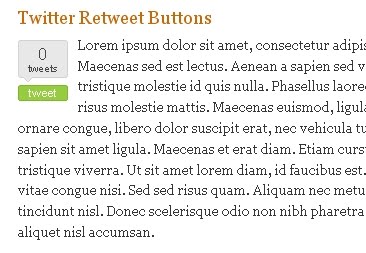
If you want it to the left side of blog post..

twitter retweet button aligning left

Find


<data:post.body/>


And Paste this code BEFORE that line..

<div style="float:left;padding: 6px 10px 6px 0px;">

<script type="text/javascript">

tweetmeme_url = '<data:post.url/>';

</script>

<script type="text/javascript" src="http://tweetmeme.com/i/scripts/button.js"> </script>

</div>


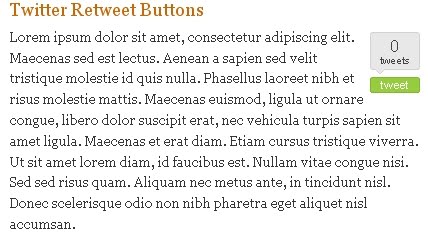
If you want it to the Right Side of post..

adding retweet button on the right side of blog post

Find


<data:post.body/>


Add this code BEFORE that line..


<div style="float:right;padding: 6px 0px 6px 6px;">

<script type="text/javascript">

tweetmeme_url = '<data:post.url/>';

</script>

<script type="text/javascript" src="http://tweetmeme.com/i/scripts/button.js"> </script>

</div>


Note: In the above two cases, if you want Compact button instead of default style, Just simple replace the default style code with compact one (refer step 1)

Finally SAVE THE CHANGES!

Thursday, 15 July 2010

How to Add Signature Image at The End of Each Posts in Blogger

I will suggest you to upload it into one of your blog post and once you have uploaded the image you can go into your post's EDIT HTML section and copy the<img src='url_of_your_signature_image' style='border:0px;'/> Code. Once you have copied that code you can delete that code but copy the code in some notepad for further use.

Steps to Add Signature Image in Blogger

#Step 1. Log in to your Blogger Dashboard and Navigate to Layout > Edit HTML and checked the Expand Widget Templates Check box.


Layout Edit HTML - Expand Widget Template


#Step 2. Find any of this code:
<div class='post-footer-line post-footer-line-1'>
OR
<p class='post-footer-line post-footer-line-1'>
OR
<data:post.body/>


Put image code you have copied already after above code and save you template.

after adding code you code should look something like this:
<div class='post-footer-line post-footer-line-1'>
<img src='url_of_your_signature_image' style='border:0px;'/>

That's it, now you will find that at the end of each blog post your signature image is displaying very well.

if you have any difficulty while implementing this hack, comment below your problem.

Wednesday, 14 July 2010

How To Create Tab View in Blogger Template ?

How to show different labels or post in blogger as Tab View. Trick blog has given a good solution for this.


Create Tab View like below image for your blog template with easy steps, follow below


Steps to create tab view:


1. Login to blogger, go to "Layout --> Edit HTML"

2. Then find this code ]]></b:skin>

3. Insert the below code before ]]></b:skin> or in CSS tag.


div.TabView div.Tabs

{

height: 24px;

overflow: hidden;

}

div.TabView div.Tabs a

{

float: left;

display: block;

width: 90px; /* Width top main menu */

text-align: center;

height: 24px; /* Height top main menu */

padding-top: 3px;

vertical-align: middle;

border: 1px solid #000; /* Top Main menu border color */

border-bottom-width: 0;

text-decoration: none;

font-family: "Times New Roman", Serif; /* Top main menu font */

font-weight: 900;

color: #000; /* Top main menu font color */

}

div.TabView div.Tabs a:hover, div.TabView div.Tabs a.Active

{

background-color: #FF9900; /* Top main menu background color */

}

div.TabView div.Pages

{

clear: both;

border: 1px solid #6E6E6E; /* Content Border color */

overflow: hidden;

background-color: #FF9900; /* Content background color */

}

div.TabView div.Pages div.Page

{

height: 100%;

padding: 0px;

overflow: hidden;

}

div.TabView div.Pages div.Page div.Pad

{

padding: 3px 5px;

}


4. You can change the code according to the text explanation.

5. The next step is put the code below before </head>


<script src='http://howtoraj.googlepages.com/tabview.js' type='text/javascript'/>


6. Then "save" it.

7. Go to "Page Elements" menu

8. Chose "Add Page Element" --> "HTML/Javascript" in place where you want to put this tab.

9. Insert this code :


<form action="tabview.html" method="get">

<div class="TabView" id="TabView">

<div class="Tabs" style="width: 350px;">

Tab 1

Tab 2

Tab 3


</div>

<div class="Pages" style="width: 350px; height: 250px;">


<div class="Page">

<div class="Pad">

Tab 1.1 <br />
Tab 1.2 <br />
Tab 1.3 <br />

</div>

</div>


<div class="Page">

<div class="Pad">

Tab 2.1 <br />

Tab 2.2 <br />

Tab 2.3 <br />

</div>

</div>


<div class="Page">

<div class="Pad">

Tab 3.1 <br />

Tab 3.2 <br />

Tab 3.3 <br />

</div>

</div>


</div>

</div>

</form>


<script type="text/javascript">

tabview_initialize('TabView');

</script>


Tips To Remember :


- The number or the blue text(350px) Is size of the tabview.

- The green code is the main menu text

- The red code is the content of tabview. you can fill it with links, banner, widget, comment or anything.

- To add more menu, see on the blink code. Add the code under it.

How to Add HTML Codes in Blogger Post ?

One of the big problem with the blogger is that it hasn't provided any tool to show HTML or Javascript code to blogger post. It is a big problem for those blogger who has Tech blog with HTML code to show on their post. There is some relief with new blogger editor which has given the inbuilt function to show the HTML/Javascript code to blog post. Did you find this ? Not yet ! find out here !!
1. Go to setting option of your blog dashboard
2. At the second option from end , you will find the option for update editor,click on the radio button
3. go to New Post and after inserting HTML code, click on the Post Option which is at the end of the post editor
4. Click on Post Option, you will find "SHOW HTML LITERALLY" under compose setting.
5. click on the radio button, it's over now, check the preview, HTML is shown on the post without any problem.

There is second method is also there :


Find out the "]]></b:skin> " in Edit HTML code of existing templates

Insert the following code just above the "]]></b:skin> "
pre
{
background:#efefef;
border:1px solid #A6B0BF;
font-size:120%;
line-height:100%;
overflow:auto;
padding:10px;
color:#000000 }
pre:hover {
border:1px solid #efefef;
}
code {
font-size:120%;
text-align:left;
margin:0;padding:0;
color: #000000;}
.clear { clear:both;
overflow:hidden;
}

That's Over, save your Templates !!!

Check for the preview whether you have inserted the right code or not


STILL FACING SOME PROBLEM , JUST LEAVE A SCRAP TO ME

Blogger New Read More Inbuilt Features

Blogger call this feature  Jump Break. With Jump Breaks you can show just a snippet of your post on your blog's index page. Blogger will insert a "Read more" link to the full post page where your readers can keep reading.

How to use this blogger readmore feature?
There are two ways to insert a "Read more" jump to your posts.

If you use the new post editor , you'll notice the "Insert jump break" icon in the editor's toolbar. Click this icon and the "jump break" will be inserted into your blog post at your cursor's position.


If you don't use the new post editor, you can still insert a jump break in Edit HTML mode by adding <!-- more -->  where you want to break your post.

Want to change the "Read more" text to your own style? No problem. You can edit the "Read more" text by clicking Layout and then Edit the Blog Posts widget.


What if I use template with automatic readmore feature? Will discuss on the next post.
One more note, the Jump Break feature does not change how your post appears in your feed. You can configure post feed options by going to Settings | Basic | Site Feed, and editing Allow Blog Feeds.

Tuesday, 13 July 2010

Related Post With Thumbnail Widget Hacks for Blogger

Many of the user currently using widget by linkwith for showing related post by category or labels.

There is another method also to show the related widget in blogger itself without any external widget like linkwith.For this blogger hack you just need to change few codes of your blogger code and everything will be fine.

1.First of all Login to your blogger dashboard and navigate to Layout > Edit HTML and check the "Expand Widget Templates" check box

2.Now look for

/head

Replace it with


<!--Related Posts with thumbnails Scripts and Styles Start-->
<b:if cond='data:blog.pageType == &quot;item&quot;'>
<style type="text/css">
#related-posts {
float:center;
text-transform:none;
height:100%;
min-height:100%;
padding-top:5px;
padding-left:5px;
}

#related-posts h2{
font-size: 1.6em;
font-weight: bold;
color: black;
font-family: Georgia, &#8220;Times New Roman&#8221;, Times, serif;
margin-bottom: 0.75em;
margin-top: 0em;
padding-top: 0em;
}
#related-posts a{
color:black;
}
#related-posts a:hover{
color:black;
}

#related-posts a:hover {
background-color:#d4eaf2;
}
</style>
<script src='http://www.box.net/shared/79ad7y9i56' type='text/javascript'/>
</b:if>
<!--Related Posts with thumbnails Scripts and Styles End-->
</head>

4. Now Find below code

<div class='post-footer-line post-footer-line-1'>

5. paste the below code just after the step-4

<!-- Related Posts with Thumbnails Code Start-->
<b:if cond='data:blog.pageType == &quot;item&quot;'>
<div id='related-posts'>
<b:loop values='data:post.labels' var='label'>
<b:if cond='data:label.isLast != &quot;true&quot;'>
</b:if>
<b:if cond='data:blog.pageType == &quot;item&quot;'>
<script expr:src='&quot;/feeds/posts/default/-/&quot; + data:label.name + &quot;?alt=json-in-script&amp;callback=related_results_labels_thumbs&amp;max-results=6&quot;' type='text/javascript'/></b:if></b:loop><a href='http://howtoraj.blogspot.com/2009/09/related-post-with-thumbnail-widget.html' style='display:none;'>Related Posts with thumbnails for blogger</a><a href='http://www.howtoraj.blogspot.com/' style='display:none;'>blogger widgets</a>
<script type='text/javascript'>
var currentposturl=&quot;<data:post.url/>&quot;;
var maxresults=5;
var relatedpoststitle="Related Posts";
removeRelatedDuplicates_thumbs();
printRelatedLabels_thumbs();
</script>
</div><div style='clear:both'/>
</b:if>
<!-- Related Posts with Thumbnails Code End-->

Note if you dont find the footer code don't worry, you may use after <p><post.body>Here.......Just replace the 'Here' with the step-5 code.

6. You may adjust the maximum number of post by

var maxresults=5;

Change number 5 to any other number

7. You may change the title of related post widget by changing this

var relatedpoststitle="Related Posts";


Just Link this post if you really find this post Interesting

Tuesday, 6 July 2010

How to Embed Windows Media Player in Blogger Post ?

Learn how to embed windows media player in blogger post or sidebar. Play your music, songs or video as an embedded source with windows media player. This code will work with all the system having windows media player install on that. This an easy hack and only thing which need to change is the source URL. Find out any source URl Play it with windows media player on your blog or website.


Copy And Paste the Below Code to where ever you want to show the Media Player


<OBJECT ID="MediaPlayer" WIDTH="300" HEIGHT="300" CLASSID="CLSID:22D6F312-B0F6-11D0-94AB-0080C74C7E95" TYPE="application/x-oleobject">
<embed showstatusbar="1" autostart="1" type="application/x-mplayer2" showtracker="1" src="http:www.howtoraj.blogspot.com" showdisplay="1" showcontrols="1" name="MediaPlayer1" height="300" width="300"></embed>
</OBJECT>

Notes :

1. Change autostart="1" to autostart="0" if you dont want wmp automatically play when you load the page.
2. Change www.howtoraj.blogspot.com with your media URL

3. You may change height and width of player

Sunday, 13 June 2010

10 SEO mistakes that may harm your blog

10 SEO mistakes that may harm your blog

SEO stands for search engine optimisation. Briefly, it's an acronym that is used to group a number of techniques to improve a site's position within search engine results.
As a developer of an open source content management system and author of several blogs, I've made the effort to learn a lot about SEO while never claiming to be a specialist, let alone an expert.
So while I'm not the best person to tell you about SEO, I do know a thing or two - such as when SEO is being overused, or when poor techniques are implemented. This post lists 10 of the most common SEO mistakes that I've seen - these may harm your blog if you do them.

1. Allowing user experience to suffer.

I've seen far too many sites that think you can "do" some SEO and it'll automatically give you great results. Well, guess what - if the user experience stinks, SEO won't bring it up to scratch. Focus on making your site a joy to use first, with clear goals and a well-defined user journey (whether it's a blog or a store - people need to know how to get around the site). SEO can be done at the same time, but it shouldn't take precedence over user experience.

2. Bloated content due to SEO techniques.

Right, so you've got some content on your site, but it's a bit too brief, and doesn't mention any of your keywords. Instead of writing the content to include keywords in a subtle way, an alarming number of sites throw masses of keywords into the content - or they put a long list of keywords at the end of the page. This looks incredibly spammy and is a major turn-off. Not to mention, you may incur a search engine penalty.

3. Using every possible technique.

Just finished reading "The 101 SEO Techniques You MUST Use! No, Really! Honest Joe Knows All!" ? Feeling a bit embarrassed that you can't really remember any of the tips, let alone why they might benefit your site? The answer is not to work through the list, ticking off the ones you've done, and noting the ones you haven't. It's not a contest to see who can implement every technique first.
Incidentally, if you do SEO for a living, and you come across a site that's actually doing pretty well - don't screw it up by polluting it with dodgy tactics that will turn the site into a link farm. If you're worried about not being paid because there's nothing left to do on the site, either find a site that actually needs your input, or add some other skills to your portfolio so you can cover yourself if your work runs dry.

4. Mixing up accessibility and SEO.

The alt attribute on an image allows you to include alternative text in case the image doesn't show up. It's not an SEO playground where you stuff a zillion keywords.

5. Link overload.

Navigational links, tag clouds, related posts and the like can enhance the user experience for visitors, when used appropriately. However, if these links just take you on a merry-go-round with a wide range of different link text taking you to the same six pages, it's going to seriously piss people off.

6. Social media madness.

Want people to share a post or link to the site? Yeah, we'll have a Twitter link, and a StumbleUpon link, Digg, Reddit, Facebook... hmm what else is there? Oh stuff it, let's add them all - and why not add a "recent tweets" widget too...
With so much third party crap on a site, you may as well just write "Welcome to my homepage" at the top, and put various smilies, blinkies and marquees on there too. In other words - if this is a business site, lose the junk and keep it clean.

7. Putting everything on the homepage.

So, your site has a few pages of content, linked from a navigation bar at the top. Hey, what if someone only visits the homepage? We should tell them everything in case they don't think to click anywhere else, then we're sure to sell them something - right?
Wrong. Aside from the fact it'll look like poo, some people may not even start at the homepage. Yes, your other pages can show up in search engines too. You're far more likely to get people clicking around your site if you keep the navigation simple and the content organised nicely, instead of dumping the whole lot on the homepage and hoping it'll make your homepage rank for lots of keywords. Which brings me nicely to the next point...

8. Failing to set sensible boundaries.

If you don't know the niche you want to target, you may as well give up now. You have to start by targeting certain keywords - preferably a few - and work on others later. But if you have a 6 page business website, you're not going to rank for every possible keyword. So don't try to. Target a few - and consider adding a blog to your site if you want to target a few more. That said, you shouldn't post about anything and everything - much like using every possible SEO technique, having too broad a focus for a blog means you'll be a jack of all trades - and a master of none.

9. Abusing related links.

Right, you've got someone to your site, what can you do now? Push them in a totally different direction? A tourist who comes to your site for tourist information probably won't benefit from a local service that only residents can apply for! It's all about knowing your audience - why not show them some souvenirs instead? Simply showing the same links to everyone might seem like a clever way to get sales for the products you're hoping to sell, but failing to tailor the results to a visitor's preferences (which could be built up over time) means you'll never quite reach your full potential.

10. Spending more time on SEO than anything else.

There comes a time when the time spent on optimisation far outweights the benefits. An SEO expert can make great inroads for your site if there are major issues to sort out, or missed opportunities that could yield great results without sacrificing the quality of the site. But endlessly tinkering with a site for negligible gain isn't a worthwhile use of anyone's time. Don't be afraid to call time on search engine optimisation once you aren't really seeing any difference.

9 Blog Hacking Tips to improve.

showreadersyourbeststuff.gif
Are you letting your killer posts languish in your archives, sandwiched between January and March? How many great posts have you published in months gone by that new visitors will never see?
Readers come to your blog for its content, so it’s important to show them straight away what you have to offer.
Your recent posts will hopefully go some way towards doing this, but to rely on them alone is to short-change the long-term effort you’ve put into building your blog. This post contains 9 blog hacks you can use to show new (and regular) visitors the best that your blog has to offer.
1. Introduce highlighted content. This could be a list of reader favorites, popular posts, most commented posts, and so on. Most bloggers handle this with a ‘Popular Posts’ widget. This is one of the most important elements of your sidebar, as it shows new visitors straight away why your site is worth exploring.
2. Take control of your highlighted content. Though most bloggers handle ‘Popular Posts’ with a plug-in there are plenty of benefits to doing it manually. You can choose which posts you want to highlight, and mix up new and old content. If you’ve got a guest-post at another blog, or if one of your posts makes it big on social media, you can tailor your ‘Popular Posts’ to suit the incoming audience.
3. Make your highlighted content unmissable. Your list of killer posts is probably more useful and interesting to new visitors than anything else in your sidebar. The perfect place for it is right under your feed button, towards the top of your sidebar. If you want to be more inventive with your placement you can, but keep it above the fold.
4. Use images to draw attention to your best posts. Images are eye-contact magnets. Rather than displaying your best posts as text links, why not create images for them? The strategy I use on my own blog is to make a medium-sized button from the image I included with the post, and add the headline as text over the image. It’s something a lot of readers seem to enjoy interacting with, and it adds some more visual interest to the blog.
5. Regularly change your highlighted content. Don’t forget about regular readers when highlighting content. If your list is static then visitors will engage with it once and forget about it, thinking they’ve seen everything it has to offer.
If you regularly change your highlighted posts you give new and old visitors a reason to engage with the content you’ve highlighted. One advantage to using images to highlight your content, as suggested above, is that it’s immediately clear when you’ve added or subtracted an item from the list.
6. Give readers somewhere to go when they’ve finished reading. Many bloggers use a ‘related posts’ plug-in, and while I do like this plug-in, I suspect that it suffers somewhat from being outside the content of the post. Firstly, feed readers miss it. Secondly, readers turn down their attention levels once they’ve finished an article. One way to best ensure readers explore your related content is to recommend it at the end of your article. For example:
Interested in this topic? You might enjoy another article I’ve written called …
Adding the suggestion to your article will catch readers while they’re still in ‘reading mode’ and devoting maximum attention to your words. However, I’d suggest using this only when you’ve written something else directly related to the topic. If your recommendation is spot-on, readers are likely to listen to other recommendations you make in future.
7. Weave targeted internal links into your posts as you write. This can be done badly, or it can be done well. A good guide is to make sure your links are highly relevant to the keywords you’re making a hyperlink. Linking a specific match (for example, linking the words ‘writing with clarity’ to an article you’ve written on the same topic) will be appreciated by your readers. Linking vague terms (like ‘blogging’, or ‘making money’), however, is not good usability because it’s simply too unclear where the link will lead.
8. Mix up posts linking out with posts linking in. A great way to draw readers deeper into your blog is to highlight great content in dedicated posts. You could highlight a selection of the best posts last month, or the most popular posts on a specific topic. You might highlight posts from this time last-year, as Lifehacker does, or list some undiscovered gems from the early days of your blog.
9. Give readers a birds-eye view of your blog. Your archives present the perfect opportunity to allow readers to view your blog from a top-down perspective, with everything it has to offer on one page. The SRG-Clean Archives plug-in presents all your post headlines under sub-headings for each month, and displays the comment count besides each. This allows readers to browse through your headlines and explore those they’re interested in.

Saturday, 12 June 2010

how to hide,disable or remove the blogger navbar(navigation bar) from your blog.

Learn how to hide,disable or remove the blogger navbar(navigation bar) from your blog.
First,let us see what blogger navbar is:


blogger navbar

Blogger navbar allows users to easily navigate to other random blogs and it also has a feauture to search the blogs ,and mark any blog as spam.
So,now you have a clear idea of what really a blogger navbar is.So, why so many people prefer to just remove the navbar inspite of the feautures it has like search,etc.Many people think that, it spoils the look of the blog,especially if your blog has differnet subtitle layout which looks too obvious to see for a visitor.Well, let me come to the actual point on how to disable or hide your blogger navbar.

Below is the step-by-step procedure on how to do it with photos to make it easy to understand.

1.Sign in to your blogger account and click the layout button next to your blog name

click the layout button

2.Next,click the edit html tab as shown in the below picture.


edit html

3.Add the below html code as specified in the below picture.
#navbar {
height: 0px;
visibility: hidden;
display: none;
}


add the code like this

4. Save the changes.

Now, you can see your blog without that navbar(this tip can only hides the navbar,it doesn't completely delete it).If you want the navbar to appear again,just remove that code and save the changes.
If you have any doubts,regarding this post,don't hesitate to ask.You can ask your doubts via comments to this post.

Saturday, 5 June 2010

Work with Animated Images in Blogger

Welcome to Steve Wallet, Architect, Blogger Tips and Tricks first guest blogger with his post on working with animated gif images, Blogger and Photoshop. As for me, I only use free software, namely Irfanview and PC Paint, so I hope Steve's post will provide useful information which I am not able to provided for those who like graphic heavy posts or blogs:


I saw Peter's article about adding .gif's to blogger (Uploading animated .gif images to Blogger post), and thought I'd give it a try. I wanted to make .gif's and post them directly to my blog, without all the complicated html and uploading from other websites. After much trial-and-error, I have created simple .gif's for my blog.

I use Adobe Photoshop and ImageReady, version 7. This article will make much more sense if you are familiar with Photoshop.

What I've learned so far.

1. To work on blogger, .gif's need to be very small: a small number of pixels and a small number of frames. .
.I start with a new Photoshop image that is 200x200 pixels, with a transparent background.
.To keep the size small and the lines crisp, I draw my images within Photoshop using my computer mouse. Lines are typically 1 or 2 pixels thick.
.I use bucket painting sparingly, because it seems to reduce the number of frames.
.The larger the image size, the fewer frames you can have and still have your .gif run on blogger. With my small and simple images, I get about 10 frames maximum.

2. It is very helpful to make sketches of each of the animation frames before you start.
Its faster to sketch on paper. Work out the number of frames, the images, what parts will move, ...

3. Drawing Hints
.At this small size, lines blur when they are rotated. You can see this, for example, on the catnip leaves in the Cat .gif (April 24,2010 posting) in my blog. I now redraw objects in the new position instead of rotating them. The rotating arm in my Design Process .gif, (April 24, 2010 posting) was redrawn for every frame.
.When you copy and paste a part of an image with a transparent background, Photoshop moves the copy. When I want to copy a piece and keep it in the same place in the next frame, I use this process:
.Bucket paint the background of both layers (layer copying from and layer pasting to).
.Copy and paste onto new layer.
.Using the Magic Wand, select and then delete the bucket painting in the old and new frames.

4. Create all your animation frames in Photoshop, then move to ImageReady just to create the .gif.
.It is MUCH easier to manipulate your images in Photoshop than in ImageReady.
.You need to create a separate layer in Photoshop for each frame of the animation.
.Use a simple layer naming system to keep track of the animation layers, such as "Frame 1, Frame 2,...."

5. Rename and resave your .gif file every time you change it.
.Somewhere between ImageReady and the post editor, your .gif file updates get lost. Any change in the file name is enough to solve this problem. I give the file a name, and then just sequentially number each version. For example: "Design Process 8" might be the eighth version.

6. A successful .gif will animate as soon as you import it to the updated post editor.
Unfortunately, I haven't come up with an exact formula for determining how many frames I can have in a .gif, I just guess. I insert the .gif in the post editor and see if it runs. If not, I go back to ImageReady and start removing frames (remembering to rename the .gif file after every change) until the .gif runs. This can make it hard to plan an animation. I often have to revise my design for fewer frames than I had wanted.

Example: My first .gif
This .gif shows a square that jumps between two positions every second.

1. Open a new image in Photoshop: 200x200 pixels, transparent background, 300 pixels/inch resolution. (File>New)
2. Draw a medium size black rectangle. (Toolbox>Foreground/Background Tool>set Foreground as black,Toolbox>Rectangle Tool)
3. Create a duplicate layer, name it "Frame 2". (Layer>Duplicate Layer)
4. Move the rectangle in layer 2 to a new position.(Toolbox>Move Tool)
5. Rename the first layer as "Frame 1". (Layer>Layer Properties)
6. Save as "Squares 1.psd" (File>Save as)
7. Jump to ImageReady (button at bottom of Toolbox)
8. Click on the arrow in the upper right hand corner of the Animation palette.
9. Select "Make Frames from Layers"
10. There should be two frames in the animation box now, each showing the square in a different position.
11. Click on the right-hand arrow again, and click on "Select all Frames".
12. Click on the "0 sec" below one of the frames, and select 1.0.
13. Select File>Save Optimized As, and save in your selected folder as "Squares-1.gif".
14. Go to your blog, create a new post using the new post editor.
15. Select "Insert Image" and insert your Squares-1.gif.
16. The square should jump between 2 positions every second.

That's the basics. Everything else is just more and more complicated images, sequences and timing. You can look at the .gif's on my blog for some ideas.

Good luck! Please share your .gif's with us.
Wednesday, 10 February 2010

How To Redirect Blog Traffic From One URL To Another ?

How to redirect blogger (blogspot) blog/website traffic from one url(address) to another
By using this trick One can redirect one blogger url to any domain of it's choice without any loss of traffic or visitors or subscribers.For example take this blog itself, "blogkorner.blogspot.com, if I want to redirect this url to some other url like pakbuzzle.com without loosing any traffic.


Process :


FOR NEW BLOGGER TEMPLATE


1.Sign into your blogger dashboard.
2.Click on the layout link > Edit html
3.Copy the below html code and Paste it anywhere between the head tags.[Defined in image below]


Note : Don't forget to replace the YOURblogaddress.com with your destination url(address)


4.SAVE THE CHANGES.


1.Sign in to your blogger dashboard
2.Click on the template link next to your blog name.
3.Copy the below code and paste it below the head tag as shown in the below screenshot


Note : Don't forget to replace the YOURblogaddress.com with your destination url(address)


With this redirection process, the old blog visitors will be redirected automatically to your new blog address or your own domain name

How to Add HTML Codes in Blogger Post ?

One of the big problem with the blogger is that it hasn't provided any tool to show HTML or Javascript code to blogger post. It is a big problem for those blogger who has Tech blog with HTML code to show on their post. There is some relief with new blogger editor which has given the inbuilt function to show the HTML/Javascript code to blog post. Did you find this ? Not yet ! find out here !!
1. Go to setting option of your blog dashboard
2. At the second option from end , you will find the option for update editor,click on the radio button
3. go to New Post and after inserting HTML code, click on the Post Option which is at the end of the post editor
4. Click on Post Option, you will find "SHOW HTML LITERALLY" under compose setting.
5. click on the radio button, it's over now, check the preview, HTML is shown on the post without any problem.


There is second method is also there :


Find out the
in Edit HTML code of existing templates


Insert the following code just above the


pre { background:#efefef; border:1px solid #A6B0BF; font-size:120%; line-height:100%; overflow:auto; padding:10px; color:#000000 } pre:hover { border:1px solid #efefef; } code { font-size:120%; text-align:left; margin:0;padding:0; color: #000000;} .clear { clear:both; overflow:hidden; }


That's Over, save your Templates !!!


Check for the preview whether you have inserted the right code or not


STILL FACING SOME PROBLEM , JUST LEAVE A SCRAP TO ME

How Add Page Element Under Header Section in Blogger ?

in few easy steps how to insert Page Elements under header section in blogger.


1. Login to your blogger account.
2. Go to LAYOUT tab.
3. Click edit HTML.
4. Click on Download full template FIRST!!.(for your backup)
5. Now we are going to make a new column under your header.
6. Hold Ctrl key and press F. Then, find this word :

7. Copy the code below and paste it before this code :


#under_header{
margin:10px 0;
padding:1%;
width:98%;
}


8. Then, find the code which look exactly like this :


9. Copy the code below and paste it exactly after that code.


10. Click Save Template button and wait until template saved.
11. Now you've DONE your work.
12. Click page element and you can see a new element under header.

How to Embed Windows Media Player in Blogger Post ?

Learn how to embed windows media player in blogger post or sidebar. Play your music, songs or video as an embedded source with windows media player. This code will work with all the system having windows media player install on that. This an easy hack and only thing which need to change is the source URL. Find out any source URl Play it with windows media player on your blog or website.

Copy And Paste the Below Code to where ever you want to show the Media Player


Notes :

1. Change autostart="1" to autostart="0" if you dont want wmp automatically play when you load the page.
2. Change www.blogkorner.blogspot.com with your media URL

3. You may change height and width of player